GitHub Wiki 📖

Unlike regular documentation created by Product Managers, GitHub Wiki documentation aims to describe the application in as granular detail as possible. The goal is to express the application targeted toward developers in an easily accessible single source of truth.
Purpose
The reason the team writes documentation in a GitHub Wiki is to aid the onboarding process of new developers and decrease the amount of “gotchas.”
A standard team rotation takes up to a month to fully onboard a developer. Writing this technical documentation allows making the rotation process efficient and repeatable thus yielding a high return on investment.
This technical documentation also saves time during project handovers and increases the value of the product the team delivers to its clients.
Time allocation
Whenever completing an epic or sizable feature, be sure to allocate some time to write documentation.
There are other cases like when adding a third-party service or cron job that requires explanation, but that is on a case-by-case basis. Ultimately, all details worth explaining in terms of the application functionalities would be in the GitHub Wiki.
Organization
Documentation has to follow a standard structure for consistency across projects. The mandatory sections are the following:
- Home
- Getting Started
- Architecture Section
- Infrastructure Section
- Operations Section
Below is an example of what it could contain:
├── Home
├── Getting Started / Project Setup
├── Architecture
│    ├── Authentication Flow
│    ├── Administration
│    └── ...
├── Infrastructure
│    ├── Cron Jobs
│    ├── Deployment Procedure
│    ├── Environment Variables
│    └── ...
├── Operations
│    ├── Debugging
│    ├── Testing
│    └── ...
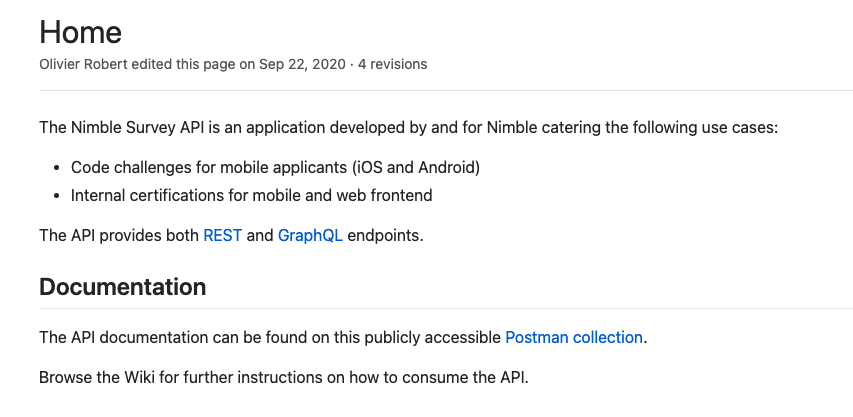
Home
This section contains a general summary of the project and background information about the application. It also briefly explains any specific terminology used in the application.
For example:
Getting Started
More technical project setup information is in this section. This section comprises of:
- Environment version requirements
- Prior tooling required
- Any information that helps set up the development environment in a usable state. (E.g. Inserting test accounts, generating required secret keys.)
Usually, the format of this section is consistent with other projects.
Architecture
This section contains any Architecture Decision References (ADRs) and explanations of the high-level application flow.
All sub-headings are specific application flows on the application. These sections house all application features and functionalities.
# Examples
├── Architecture (ADRs and high-level diagrams)
│    ├── Registration
│    ├── Payment Flow
│    ├── Admin Section
│    └── ...
Infrastructure
This section involves any prior application setup that requires explanation, such as CI/CD, secrets management, localization, and ongoing cron jobs.
It is primarily to help developers understand the proper setup and deployment of the application.
# Examples
├── Infrastructure (Cloud/Hosting Infrastructure Diagram)
│    ├── Ongoing Cron Jobs
│    ├── Deployment Procedure
│    ├── Environment Variables
│    ├── Localization
│    ├── Secret Management
│    └── ...
Operations
Any activity that will ensure the smooth running or maintenance of the application goes here.
This section gives an overview of administrative tasks that are pertinent to the running of the application. Subheadings usually contain helpful debugging procedures, testing helpers, or mock data used in tests.
# Examples
├── Operations (Overview of important tasks)
│    ├── Running Tests
│    ├── Running Docker tests on the CI
│    ├── Automated Code Review Setup
│    ├── Debugging
│    ├── Testing
│    └── ...
Documentation Review
Reviewing documentation is similar to reviewing regular pull requests.
There are other guidelines the team should follow:
- Ensure all content is formally written in an active voice.
- Pay extra attention to grammar and punctuation. Use a grammar-checker such as Grammarly.
- Ensure the target audience of the documentation is aimed towards developers with a limited understanding of the project.
- As there are many opinions on conveying the same message, aim to resolve discussions quickly.
Asset Management
Adding Images
By default, the text editor for GitHub Wiki does not support image uploads and would require hosting images elsewhere. But GitHub Wikis are regular Git repositories, so it is possible to add assets by:
-
Clone the repository to the local development environment.
-
Add all images under the
assets/images/directory.
.github/
|  └── wiki/
|       ├── Home.md
|       ├── Getting-started.md
|       └── assets/
│            └── images/
│                 ├── architecture/
│                 │     └── authentication-diagram.png
│                 ├── infrastructure/
|                 |     └── heroku-dyno.png
|                 └── operations/
|                       └── data-export.png
...
- Links to images inside the content use a relative URL.
- Adding images without any width/height:
 - Adding with a set width/height:
[[assets/images/infrastructure/heroku-dyno.png|alt="Heroku Dyno Overview"|height=210px|width=210px]]
- Adding images without any width/height:
Referencing Internal Pages
Use one of the following syntaxes to link to other pages within the wiki. There is no need for the absolute path.
- For example: given a file name
Automated-code-review.md, it can be linked to as:[[Automated code review]]
A different title for the link can be used:
- For example: given a file name
Scale-in-out-manually.md, a link can be created with a freely chosen title to refer to that page as:[[Scale ECS cluster in/out manually|Scale in out manually]]
Customized Sidebars
The default sidebar of GitHub is a flat list of all pages in alphabetical order. That is why the team recommends using a custom sidebar to add a visual hierarchy to documentation for easier reference.
Use the headings in the documentation organization in the _Sidebar.md. When adding a new page, be sure to link the page as a link in the Sidebar under the correct section.
A typical sidebar follows the following organization structure:
# Table of Contents

- [[Home]]
- [[Getting Started]]

## Architecture

- [[Authentication Flow]]
- [[Administration]]
...

## Infrastructure

- [[Cron Jobs]]
- [[Deployment Procedure]]
- [[Environment Variables]]
...

## Operations

- [[Debugging]]
- [[Testing]]
...