
To aid developers in creating an immersive experience, Android 10 added a new Gesture Navigation that allows applications to make use of more device screen’s real estate.
This blog post targets to explain how applications should work with the new Gesture Navigation and ways to mitigate gesture conflicts. We will also dig into how to update existing applications to support edge-to-edge and draw behind the system bars to create an immersive user experience.
The need for Edge-to-edge support
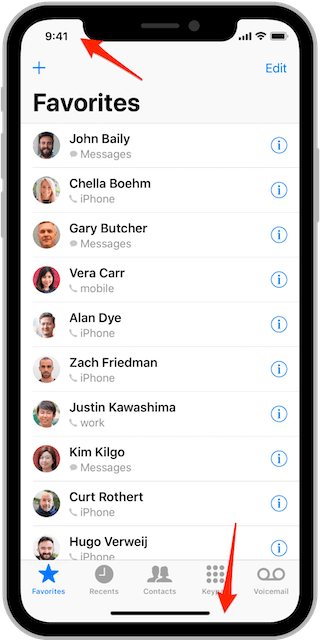
How does an iOS app look?
iOS uses a gesture-based navigation on all devices since the iPhone X. Applications can thus be laid out fullscreen from top to bottom edges.
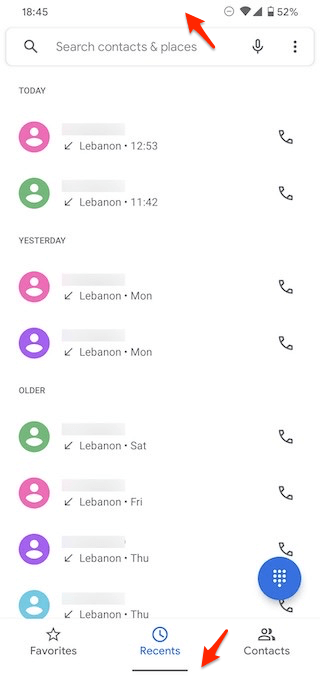
How about Android, with the new navigation gestures?
On Android Q, a new system navigation mode has been added, allowing the user to navigate back, navigate to the home screen, and trigger the device assistant via gestures, instead of the traditional 3-buttons navigation bar.
By moving to a gesture model for system navigation, the OS can provide more of the screen real estate to the application itself thus creating better user experience.
If you run a new emulator instance or device with
API 29,Gesture Navigationmight not be turned on by default. To enableGesture Navigation, select System settings > System > System Navigation > Gesture Navigation.
But supporting the new Gesture Navigation is not that simple.
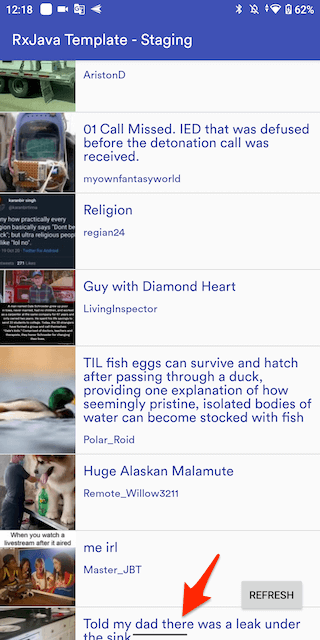
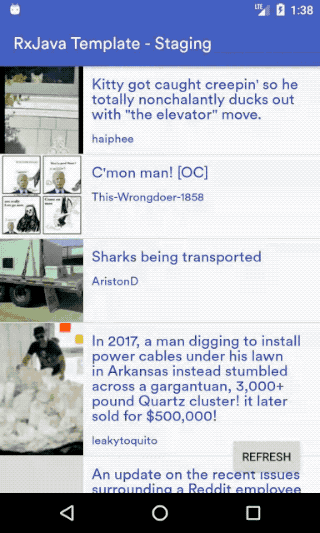
Let’s look at this sample Android application after switching the System navigation setting to the new Gesture Navigation.
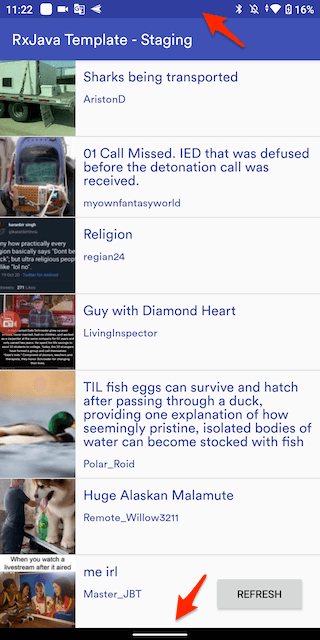
As you can see, the top and bottom app boundary do not fit the fullscreen display area. There is a black gap at the bottom where the navigation bar is located. Somehow, this application needs to be updated to support the new Gesture Navigation. But the question is: do we really need to do that?
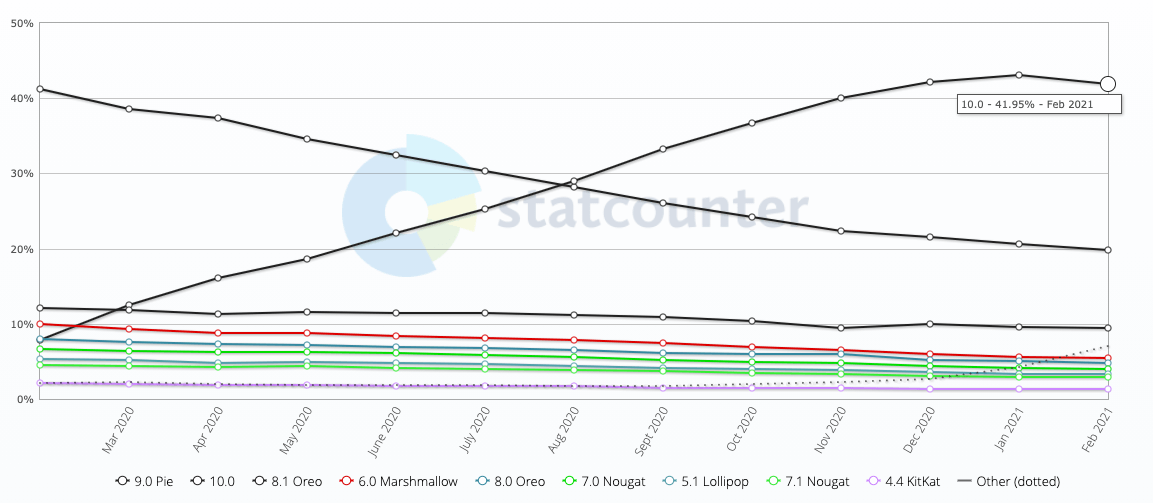
Android market share statistics
From this report, Android 10 covers over 40% of devices, and all versions from Android 8.0 (when Android started to support translucent bottom navigation bar) cover over 75% of devices. This means that there are many devices running on the newer versions of Android OS. Therefore, there is a clear need for upgrading the application to solve the view bound issue above if we want to bring a better user experience.
Going Edge-to-Edge on Android
Set Immersive app bound
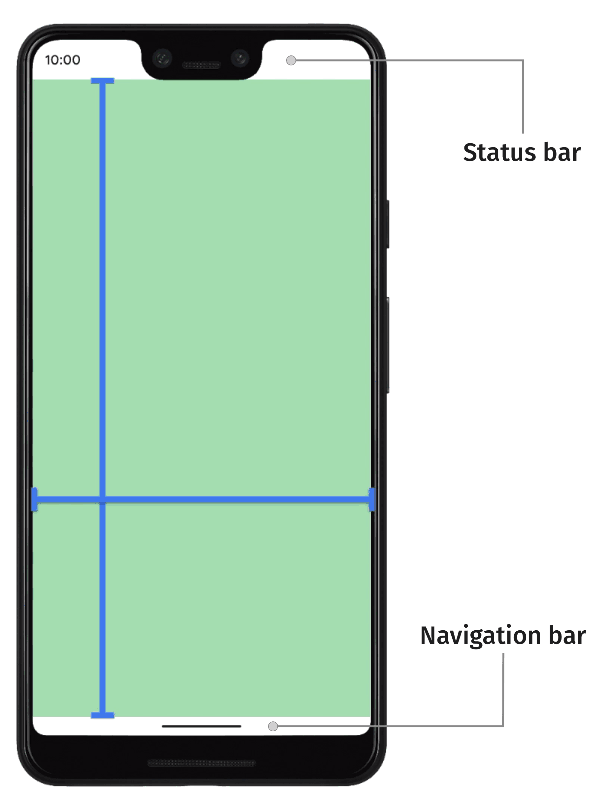
To offer an edge-to-edge experience - regardless of whether gestures or 3-buttons are enabled for navigation - applications must draw behind the transparent navigation and status bars.
It is also necessary to set the system UI visibility flags to tell the system to lay out the application underneath the system bars.
protected val fullScreenSystemUiVisibility = SYSTEM_UI_FLAG_IMMERSIVE or
    SYSTEM_UI_FLAG_LAYOUT_STABLE or
    SYSTEM_UI_FLAG_LAYOUT_FULLSCREEN or
    SYSTEM_UI_FLAG_LAYOUT_HIDE_NAVIGATION

private val systemUiVisibility = fullScreenSystemUiVisibility or
    SYSTEM_UI_FLAG_LIGHT_STATUS_BAR or
    SYSTEM_UI_FLAG_LIGHT_NAVIGATION_BAR

private fun setWindowStyle() {
    requireActivity().window.decorView.run {
        systemUiVisibility = this@BaseFragment.systemUiVisibility
    }
}
When these flags are set together, the OS is instructed to display the application in fullscreen as if the navigation and status bars are not present.
Lower API level compatibilities
- The immersive mode to all screens has been set on possible API levels (from
API 26), keeping the status bar and navigation bar as translucent. - On
API 23-25, Android does not supportSYSTEM_UI_FLAG_LIGHT_NAVIGATION_BAR, therefore the navigation bar will remain in black. - On
API 21-22, Android does not supportSYSTEM_UI_FLAG_LIGHT_STATUS_BAR, therefore the status bar will also remain in black.
protected val fullScreenSystemUiVisibility = SYSTEM_UI_FLAG_IMMERSIVE or
    SYSTEM_UI_FLAG_LAYOUT_STABLE or
    SYSTEM_UI_FLAG_LAYOUT_FULLSCREEN or
    SYSTEM_UI_FLAG_LAYOUT_HIDE_NAVIGATION

protected open val systemUiVisibility = when {
    Build.VERSION.SDK_INT >= Build.VERSION_CODES.P -> {
        fullScreenSystemUiVisibility or
        SYSTEM_UI_FLAG_LIGHT_STATUS_BAR or
        SYSTEM_UI_FLAG_LIGHT_NAVIGATION_BAR
    }
    Build.VERSION.SDK_INT >= Build.VERSION_CODES.M -> {
        SYSTEM_UI_FLAG_VISIBLE or
        SYSTEM_UI_FLAG_LIGHT_STATUS_BAR
    }
    else -> {
        SYSTEM_UI_FLAG_VISIBLE
    }
}
In case the application bar has a dark color, while the system status bar is in light color, the flag SYSTEM_UI_FLAG_LIGHT_STATUS_BAR can be omitted:
protected val fullScreenSystemUiVisibility = SYSTEM_UI_FLAG_IMMERSIVE or
    SYSTEM_UI_FLAG_LAYOUT_STABLE or
    SYSTEM_UI_FLAG_LAYOUT_FULLSCREEN or
    SYSTEM_UI_FLAG_LAYOUT_HIDE_NAVIGATION

protected open val systemUiVisibility = when {
    Build.VERSION.SDK_INT >= Build.VERSION_CODES.P -> {
        fullScreenSystemUiVisibility or
            SYSTEM_UI_FLAG_LIGHT_NAVIGATION_BAR
    }
    else -> {
        SYSTEM_UI_FLAG_VISIBLE
    }
}
Consider to set status bar and navigation bar color to translucent:
- styles.xml (values)
<style name="AppTheme" parent="Theme.AppCompat.Light.NoActionBar">
    <item name="android:statusBarColor">@color/colorStatusBar</item>
    <item name="android:navigationBarColor">@color/colorNavigationBar</item>
</style>
- colors.xml (values)
<color name="colorStatusBar">@null</color>
<color name="colorNavigationBar">@null</color>
- colors.xml (values-v23)
<!--SYSTEM_UI_FLAG_LIGHT_STATUS_BAR has been supported from API 23-->
<color name="colorStatusBar">@color/colorPrimary</color>
- colors.xml (values-v26)
<!--SYSTEM_UI_FLAG_LIGHT_NAVIGATION_BAR has been supported from API 26-->
<color name="colorStatusBar">@android:color/transparent</color>
<color name="colorNavigationBar">@android:color/transparent</color>
For more information on how to lay out the application to support Edge-to-edge, check out this article
Leverage insets for a better UI
After making the application go Edge-to-edge, unfortunately, this might result in some of your views being drawn behind the system bars, making them invisible and/or inaccessible to the user. To resolve this issue, the window insets for those views must be updated to move them away from the system bars.
System window insets are the most common type of insets in use today. The primary method to access WindowInsets is via the setOnApplyWindowInsetsListener method.
Let’s look at an example of a view where we want to add top padding so that it would not be displayed behind the system status bar:
setOnApplyWindowInsetsListener { view, insets ->
    view.updatePaddingRelative(top = insets.systemWindowInsetTop)
    insets
}
For more information about insets handling, check out this article
Think about a helper for common usages
So whenever we need to update our views to the correct position, the above setter must be called to get system insets and update the corresponding margin/padding.
To save time and avoid code duplication, let’s introduce the below helper to automate and simplify efforts on edge-to-edge work. Ideally, this helper should provide:
- An option to update
marginorpadding. - A
gravityparam option to updateTOPorBOTTOMdirection. -
forceInsetsApplyingto force apply insets even for low API levels.
fun View.handleVisualOverlaps(
    marginInsteadOfPadding: Boolean = true,
    gravity: Int = Gravity.BOTTOM,
    forceInsetsApplying: Boolean = false
) {
    if (Build.VERSION.SDK_INT >= Build.VERSION_CODES.P || forceInsetsApplying) {
        val marginTop = marginTop
        val paddingTop = paddingTop
        val marginBottom = marginBottom
        val paddingBottom = paddingBottom
        setOnApplyWindowInsetsListener { view, insets ->
            when (gravity) {
                Gravity.TOP -> {
                    val insetTop = insets.systemWindowInsetTop
                    if (marginInsteadOfPadding) {
                        view.updateMargin(top = insetTop + marginTop)
                    } else {
                        view.updatePaddingRelative(top = insetTop + paddingTop)
                    }
                }
                Gravity.BOTTOM -> {
                    val insetBottom = insets.systemWindowInsetBottom
                    if (marginInsteadOfPadding) {
                        view.updateMargin(bottom = insetBottom + marginBottom)
                    } else {
                        view.updatePaddingRelative(bottom = insetBottom + paddingBottom)
                    }
                }
            }
            insets
        }
    }
}

fun View.updateMargin(@Px top: Int = 0, @Px bottom: Int = 0) {
    val params = layoutParams as ViewGroup.MarginLayoutParams
    params.setMargins(
        marginStart,
        if (top == 0) marginTop else top,
        marginEnd,
        if (bottom == 0) marginBottom else bottom
    )
    layoutParams = params
}
Then this helper can be used to adjust toolbar position as the following:
class MainActivity : AppCompatActivity() {

    override fun onCreate(savedInstanceState: Bundle?) {
        super.onCreate(savedInstanceState)
        toolbar.handleVisualOverlaps(gravity = Gravity.TOP)
    }
    ...
}
Automate the way to handle visual overlaps on all screens
In the next step, to avoid any missing visual overlaps handling in any screen or component, let’s implement an interface or abstract class to automatically enforce putting the corresponding handlers for the necessary views in all screen layouts.
abstract class BaseFragment : Fragment() {

    @CallSuper
    override fun onViewCreated(view: View, savedInstanceState: Bundle?) {
        super.onViewCreated(view, savedInstanceState)
        handleVisualOverlaps()
    }

    /**
     * The initial callback where you want to place your visual overlaps handling on necessary
     * components after applied Edge-to-Edge.
     *
     * This method usually get called multiple times, whenever the Fragment view is being
     * created/re-created. Ideally, you would want to call setOnApplyWindowInsetsListener on
     * necessary components to relocate your components to particular positions here.
     *
     * This is called right after [BaseFragment.onViewCreated]
     */
    abstract fun handleVisualOverlaps() {}
}
class HomeFragment : BaseFragment() {

    override fun handleVisualOverlaps() {
        rvMainData.handleVisualOverlaps(marginInsteadOfPadding = false)
        btMainRefresh.handleVisualOverlaps()
    }
    ...
}

class SecondFragment : BaseFragment() {

    override fun handleVisualOverlaps() {
        btOpenCamera.handleVisualOverlaps()
        btOpenPost.handleVisualOverlaps()
    }
    ...
}

class WebViewFragment : BaseFragment() {

    override fun handleVisualOverlaps() {
        webView.handleVisualOverlaps()
    }
    ...
}
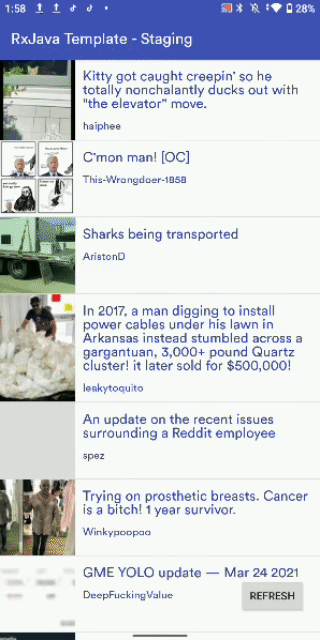
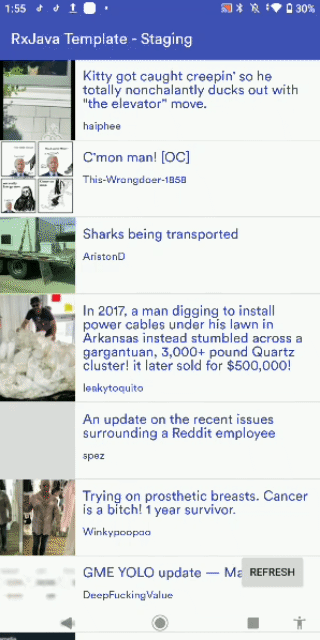
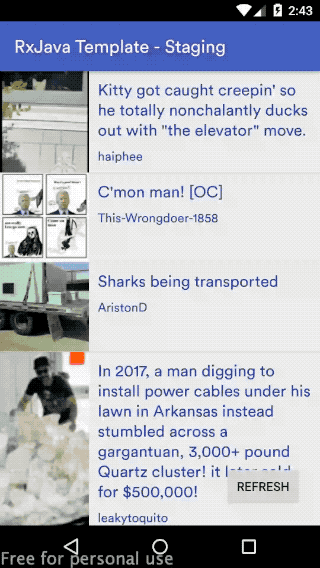
…and yeah, here is the result on all possible cases:
Summary
Many Android devices are running on modern Android OS versions with the new Gesture Navigation. So consider upgrading your application and support Edge-to-edge to bring a better user experience.
Enabling it is not as complicated or time-consuming as you might think, especially with this blog’s help 😉. Furthermore, because of a long journey filled with plenty of variations of Android navigation, this might save much time dealing with API level compatibility issues - which would be a nightmare in Android development 🍺.
If you have any questions, issues, or features, please check out this PR on our Android Template repository. Issues and pull requests are welcome! 🎉